Tying meat is not necessarily an everyday task in the average kitchen, and when a recipe calls for it, it can suddenly feel like a pretty big headache.
Of course, I won’t pretend that my goal here is to give you professional butcher training—after all, I’m not a butcher myself. But at a home-cook level, it really is very easy to learn how to tie meat so it holds together and looks nice. And really, what else would we need tied meat for?
The Only Tool You Need
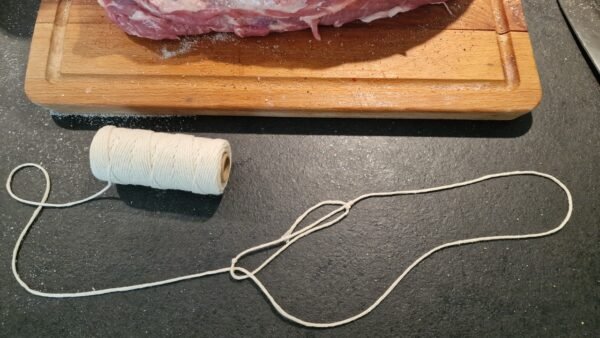
Tying meat requires just one special tool, and that is butcher’s twine. I’m not saying it would be impossible to do this with a thicker thread—because if I said that, I’m sure I’d hear all about it in the comments or in a Facebook post. But joking aside, if you’re making a recipe where the meat needs to be tied, it’s worth buying the twine ahead of time.
Butcher’s twine goes by many names. Butcher’s twine, kitchen twine, meat-tying twine, butcher’s string—they all mean the same thing.
In theory, you might find it in very large grocery stores. I bought mine in a place like that, though not locally. It’s probably worth searching online instead, either to order it there or at least to see where to look for it. Luckily, it is usually sold in fairly long rolls, so you may not need to buy a new one for years.
How to Tie Meat
Tying meat can be a real challenge if you’ve never done it before. But there’s no need to be intimidated—we’re not preparing meat for a butcher shop or an exhibition. The only thing that matters is that it stays together while cooking, and for that you don’t necessarily need a professional tying technique. It’s easy to learn and pick up, even from written instructions and pictures like the ones you’re reading now.
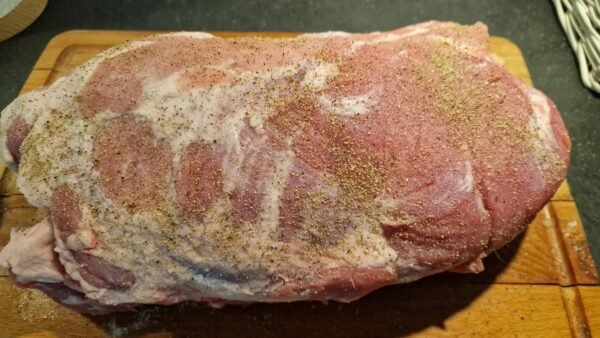
As the first step, prepare the meat in the form you want to tie it. For whole pieces of meat, this doesn’t mean anything extra. For roulades or stuffed meats, simply roll them up and prepare them so all that’s left is the tying.
Before tying, place the meat on a cutting board or kitchen counter.

Tie a loop with a simple knot at the end of the butcher’s twine.
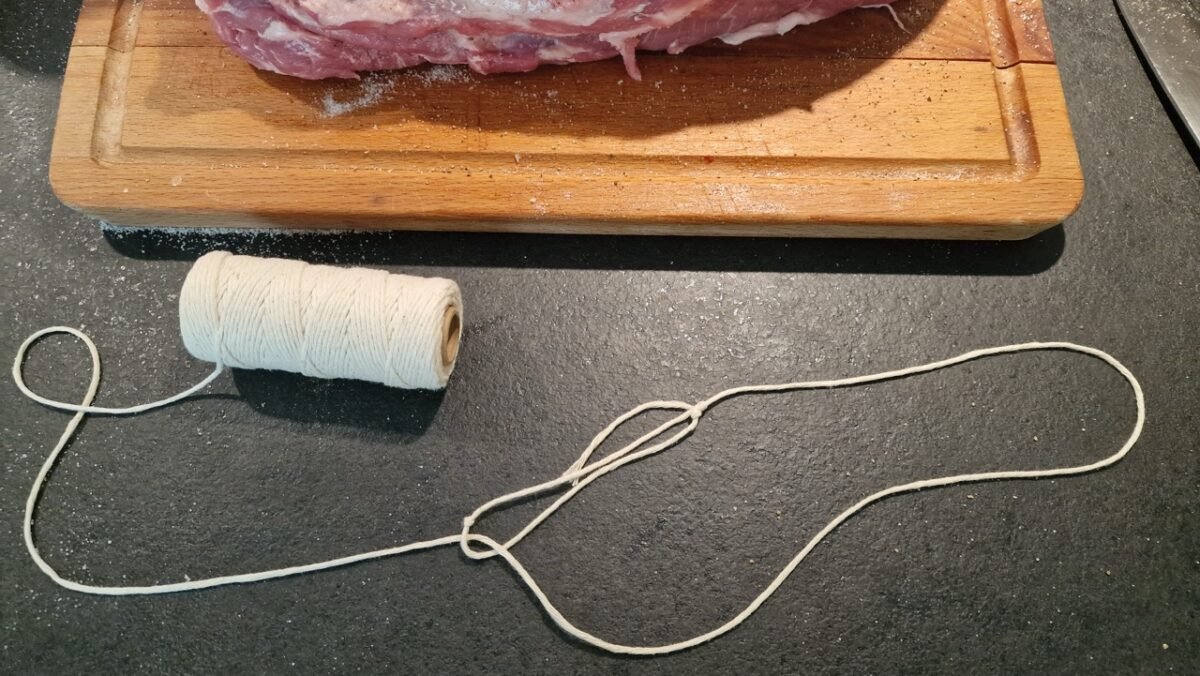
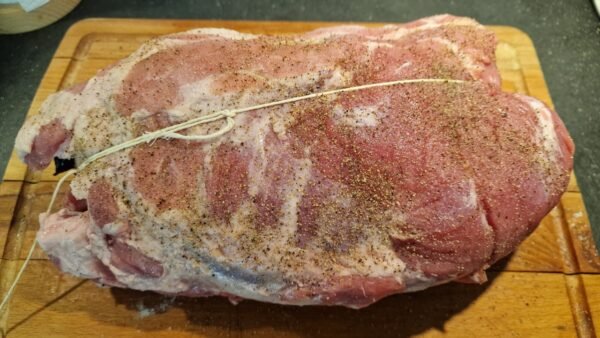
Pass the full length of twine through this loop, then place the large loop you have created lengthwise under the meat. Pull the whole thing tight so it holds the meat firmly from end to end. Because the twine has been passed through the loop, this will happen almost on its own. The loop moves freely, letting the twine tighten without getting stuck.
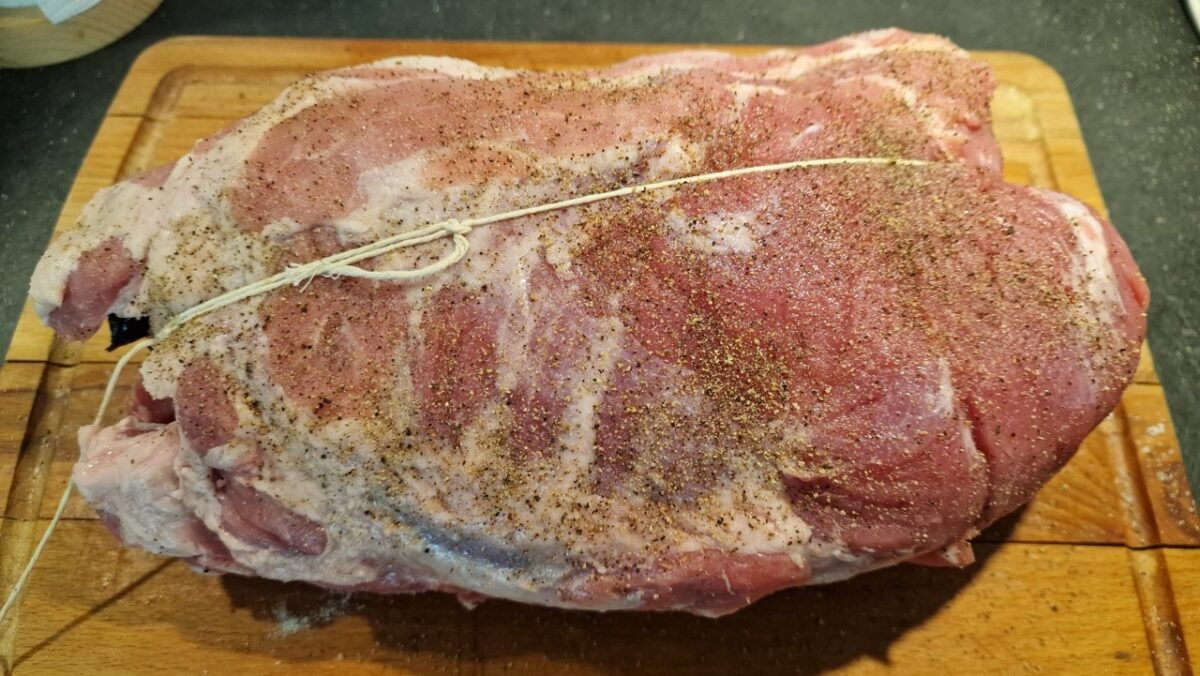
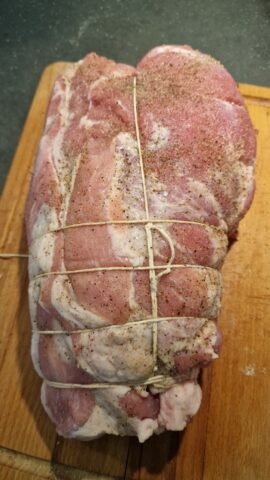
Across the meat, wrap the twine around it about every 1 inch (3 cm) and tighten it. You don’t need to cut the twine—that’s the more professional technique used by butchers. Instead, simply wrap the twine once around the meat crosswise and pull it tight. On the underside, move the twine about 1 inch (3 cm) farther along, wrap it around again, and pull it tight. Keep going this way all the way to the end of the meat.

At the end, simply tie a knot in the twine and cut off the excess.
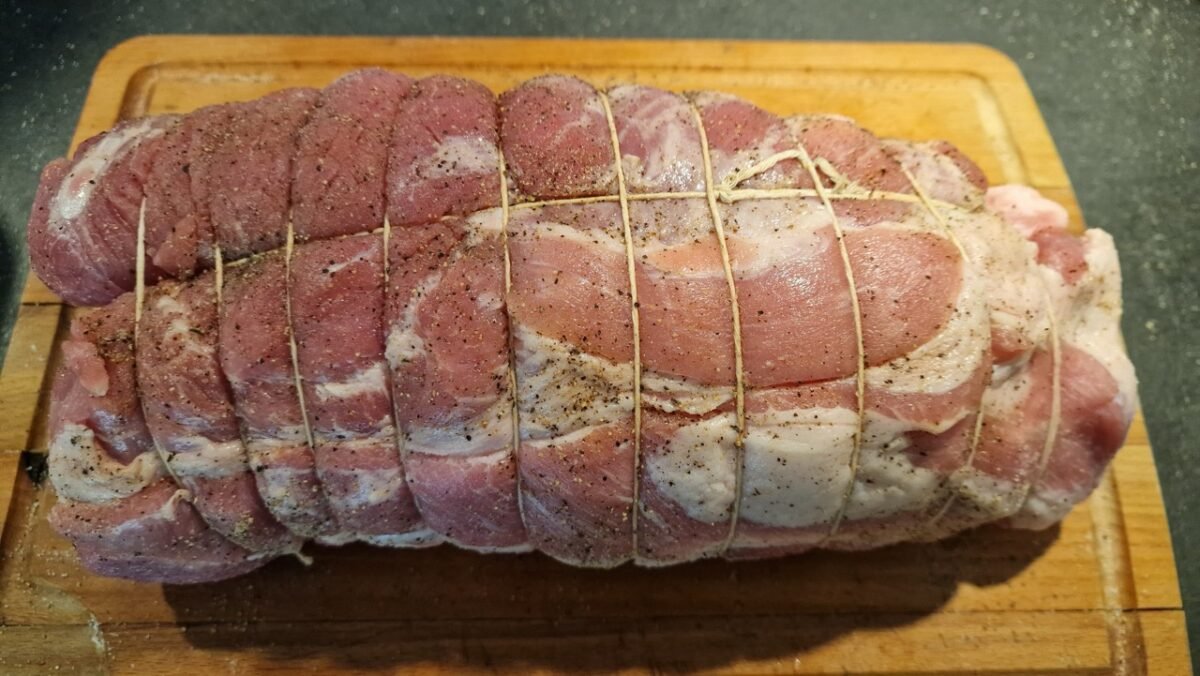
Perhaps the most important tip when tying meat is to pull the twine very tightly each time so it actually holds the meat. That is, in fact, the whole point of tying. You can—and should—adjust the tightness a little depending on how thick the meat is in that spot. The goal is a relatively even thickness. So where the meat is thicker, pull the twine tighter, quite firmly. Where it is less thick, you can be a little gentler.
The tied meat is ready. If you’ve done it well, the twine will hold it together, and it will be easy to work with. After roasting or any other heat treatment, simply cut off the twine and throw it away.
What Kinds of Meat Need to Be Tied at Home?
In many cases, tied meat can be bought from the butcher or at the store. A typical example in many households is tied ham, though the tying technique there is not the same as what I’m writing about here. In that case, you don’t have to bother tying it yourself; you get the meat already tied and can handle it as one piece.
At home, this technique is typically needed when making roulades or rolled meats. Not many people know this, but tying meat is not only useful for holding together a roulade rolled up with filling, for example. It is also useful for giving shape and nearly even thickness to a whole piece of meat before roasting. So tying can also be used for meats roasted whole.
How to Tie Meat
Instructions
- Place the meat on a cutting board or kitchen counter.

- Tie a loop with a simple knot at the end of the butcher’s twine.
- Pass the full length of twine through this loop, then place the large loop you have created lengthwise under the meat. Pull the whole thing tight so it holds the meat firmly from end to end. Because the twine has been passed through the loop, this will happen almost on its own. The loop moves freely, letting the twine tighten without getting stuck.
- Across the meat, wrap the twine around it about every 1 inch (3 cm) and tighten it. You don’t need to cut the twine—that’s the more professional technique used by butchers. Instead, simply wrap the twine once around the meat crosswise and pull it tight. On the underside, move the twine about 1 inch (3 cm) farther along, wrap it around again, and pull it tight. Keep going this way all the way to the end of the meat.

- At the end, simply tie a knot in the twine and cut off the excess.