Making hard-boiled eggs sounds like no big challenge. But preparing the perfect hard-boiled eggs (see my specifications below) can be intimidating for even the most experienced home cooks. Exactly how long should you boil your eggs? Can you prevent the shell from cracking? How do you peel hard-boiled eggs so the shell comes off easily? Let’s find the answers to all these questions.
See the recipe below for clear and simple instructions on how to prepare the perfect hard-boiled eggs. Read the whole article if you want more information about boiling your eggs.
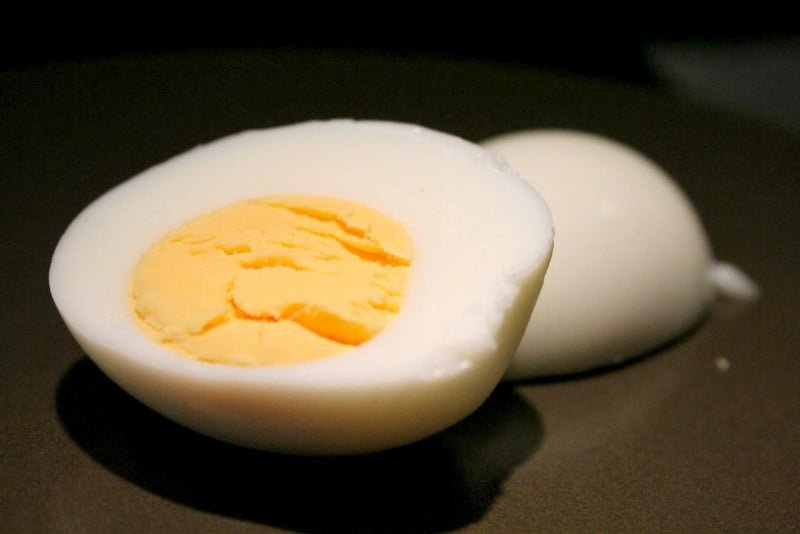
Perfect Hard-Boiled Eggs
When we’re talking about hard-boiling eggs, I think we can agree that we all want the following results:
- The yolk is perfectly cooked.
- No bluish outer layer forms between the yolk and the white.
- The shell does not crack while cooking.
- The shell comes off easily.
- The peeled egg is nice and smooth, with no cracks.
To Prevent Cracking
It is very annoying when one or more of your eggs crack while boiling. This usually happens because your eggs are cold and they get a heat shock from the hot water.
One method to prevent this is simply not to store your eggs in the fridge. Unfortunately, this isn’t an option if you live in the U.S., but you can go ahead and store your eggs in the pantry in pretty much all other parts of the world. It’s a simple test: if the eggs are sold from a refrigerator in your supermarket, you need to store them in the fridge; otherwise, you don’t. Read this article for more information on storing your eggs in the fridge.
The other method, which works even with refrigerated eggs, is to bring your eggs up to room temperature before boiling them. Simply put your cold eggs in lukewarm water for 10 minutes. Make sure to boil them immediately after this.
How Long Should You Cook Your Eggs?
To make hard-boiled eggs, you need to cook the eggs for 8 minutes. Period. The best method is to place your eggs in a saucepan and cover them with cold water. Bring to a boil and turn down the heat to low. Start your timer and cook the eggs for exactly 8 minutes.
Any less than 8 minutes, and your yolk won’t be perfectly cooked. Great idea for a soft-boiled egg, but not a hard-boiled one.
On the other hand, if you cook your eggs longer, an unpleasant bluish layer will form between the yolk and the white. Definitely not something you want from your perfect hard-boiled eggs.
Please note that this bluish layer is just the result of cooking your eggs longer than needed. Hard-boiled eggs are fine to eat even with this appearance; they are just not that good-looking. So even if you overcook your eggs, you can safely eat them.
How to Peel Hard-Boiled Eggs
Sometimes the biggest challenge when it comes to hard-boiling eggs is actually peeling them. You might find the process difficult, or removing the shell can crack the hardened egg white so it becomes cracked, fractured, and unpleasant to serve.
To easily peel your hard-boiled eggs, there are actually a couple of tricks. The first one might even seem strange at first.
- The less fresh your eggs are, the easier they are to peel. Try to use eggs that are nearing their expiration date for hard-boiling. You’ll be surprised to see that their shells come off much more easily.
- Once your eggs are cooked, cool them immediately in cold water. Change the water 2-3 times to make sure your eggs have cooled down.
- Peel your eggs, breaking off the shells, under running cold water.
Hard Boiled Eggs
Equipment
- saucepan
Ingredients
- 8 eggs
Instructions
- Cover the eggs with cold water in a saucepan.
- Bring to a boil and turn down the heat to low.
- Cook the eggs for exactly 8 minutes.
- Cool your eggs immediately in cold water.
- Break off the shells under running cold water.
You Only Need a Saucepan
You can find online instructions on how to hard-boil eggs in an Instant Pot, pressure cooker, egg cooker, slow cooker, or even microwave. But you don’t really need any fancy equipment to make hard-boiled eggs.
Just use your favorite saucepan, follow the recipe, and you’re all set. You can make hard-boiled eggs with or without a lid. Make sure to set the heat a bit higher if you are not using a lid.
")


